PubChem is an invaluable source of information about 99 million molecules accessible via a website or programmatically.
PubChem is an open chemistry database at the National Institutes of Health (NIH). “Open” means that you can put your scientific data in PubChem and that others may use it. Since the launch in 2004, PubChem has become a key chemical information resource for scientists, students, and the general public. Each month our website and programmatic services provide data to several million users worldwide.
PubChem mostly contains small molecules, but also larger molecules such as nucleotides, carbohydrates, lipids, peptides, and chemically-modified macromolecules. We collect information on chemical structures, identifiers, chemical and physical properties, biological activities, patents, health, safety, toxicity data, and many others.
However it would be unwise to search using proprietary structures and so there is need to be able to search a local copy. This tutorial is intended to show a very simple way to provide a searchable resource using SQLite. SQLIte is a simple, fast database engine that is already installed in macOS.
Getting the data
The PubChem chemical data is available for download from the ftp site. https://ftp.ncbi.nlm.nih.gov/pubchem/Compound/CURRENT-Full/

I chose to download the sdf files. First create a folder called PubChem and then navigate to that folder in the Terminal. Te easiest way to to type cd and then drop the PubChem folder onto the Terminal window.
|
1 |
cd /Users/chrisswain/Projects/Pubchem |
We can then use wget to download all the files, the files are available in different compressed formats this command just downloads the .gz versions.
|
1 |
wget "ftp://ftp.ncbi.nlm.nih.gov/pubchem/Compound/CURRENT-Full/SDF/*.sdf.gz" |
This will take some time depending on the server load and your download speed. You should end up with a folder containing over 340 files (over 300 GB).
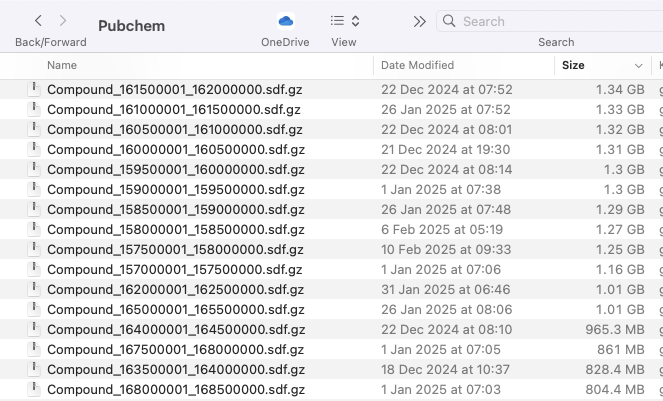
Each of the files contains data on many records, and a lot of detailed information about each record some of which is shown below.
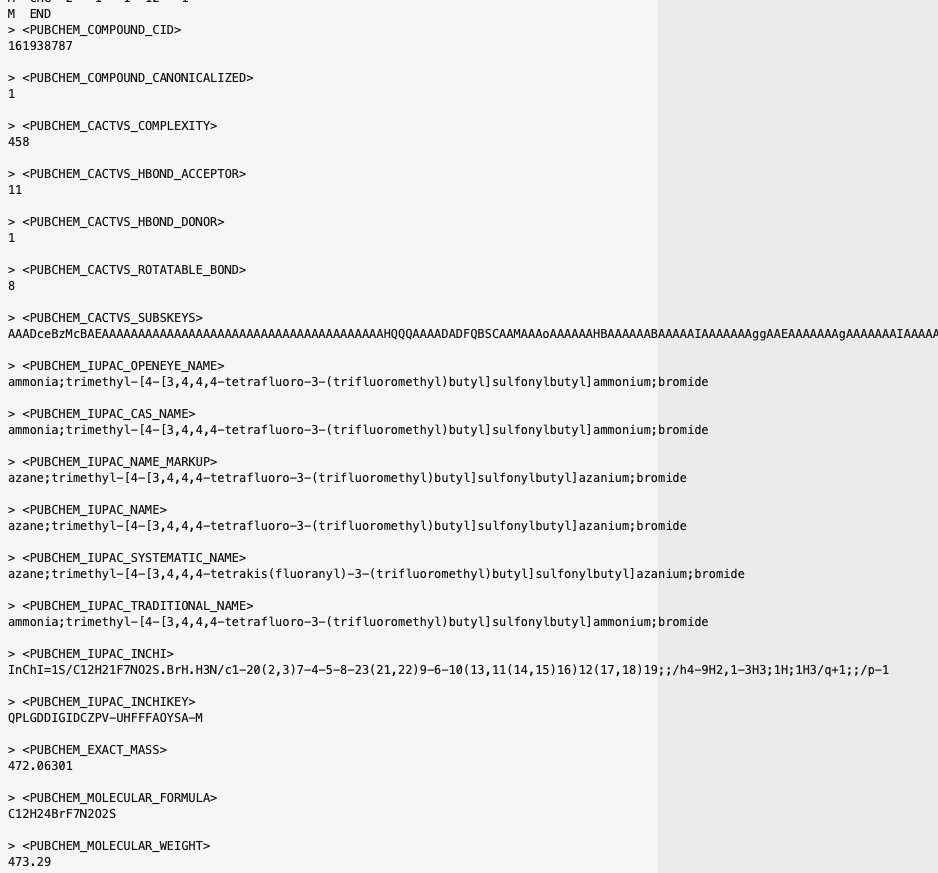
Whilst you could import all the data into the SQLite database, for the purpose of this tutorial we are only going to use SMILES, ID and INCHKEY.
The Jupyter notebook used to extract the information from all the files is shown below. First we create some folders to store the generated SMILES etc. Depending on the options chosen you might not need all these folders. If you have a file from a less reliable source you may want to first filter the input to remove any structures that contain errors.
Different algorithms can sometimes generate different SMILES strings so we use OpenBabel to generate the SMILES and extract the title and InChiKey from the sdf file. (If you only want the SMILES use the other cell).
|
1 |
!/Users/chrisswain/miniconda3/bin/obabel '{sdfPath}' -osmi -O '{smiFile}' --canonical --append "PUBCHEM_IUPAC_INCHIKEY" |
This will take a little while and will populate the INCHIKEY folder with a series of files as shown below.
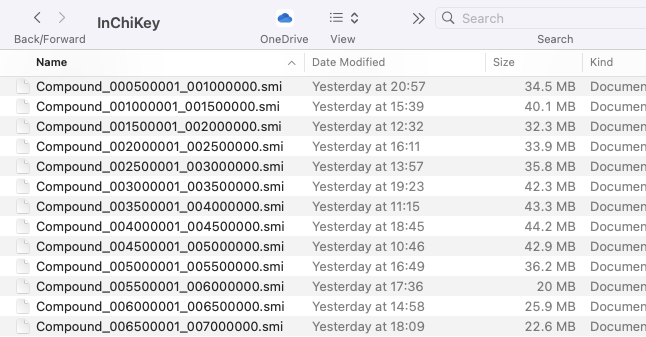
We now need to combine all these files into a single file for importing into the database, to do this we use the unix command cat. In the Terminal cd to the InChiKey folder and type the following command
|
1 |
cat *.smi > AllInChiKey.tsv |
This concatenates all the .smi files into a single file called AllInChiKey.tsv. Unfortunately we still need to modify this file, we need to add a header with column names, and the output has the SMILES and ID separated by a tab and the ID and InChiKey separated by a space. I used BBEdit to open the file and add a first row with a tab separator between each of the column names.
SMILES ID INCHIKEY
I then did a find and replace to change all the spaces to tab, the result is an 8.6GB file in this format.
|
1 2 3 4 5 6 |
SMILES ID INCHIKEY OCC1C2C=CC(C1CN(C)C)C2 500002 DIQDXPBIFAYNCC-UHFFFAOYSA-N c1ccc(cc1)CCC[P+](c1ccccc1)(c1ccccc1)c1ccccc1 500003 YEWDWCMFWXAKLL-UHFFFAOYSA-N OC(C[P+](c1ccccc1)(c1ccccc1)c1ccccc1)C 500004 GWIVKYPOQRMFCN-UHFFFAOYSA-N c1ccc(cc1)C(=C)[P+](c1ccccc1)(c1ccccc1)c1ccccc1 500006 PSDOHKFRPIPOFP-UHFFFAOYSA-N C(=CC[P+](c1ccccc1)(c1ccccc1)c1ccccc1)C 500007 BMCPTAFSDADFNW-UHFFFAOYSA-N |
Creating the SQLite database
I’ve written about creating SQLite databases before and this follows a very similar process. In Terminal navigate to the PubChem folder and type the following
|
1 2 3 4 5 6 7 8 9 10 11 12 13 14 15 16 17 18 19 |
sqlite3 pubchem.sqlite; SQLite version 3.43.2 2023-10-10 13:08:14 Enter ".help" for usage hints. .databases main: /Users/chrisswain/Projects/Pubchem/pubchem.sqlite r/w sqlite> CREATE TABLE ID_DATA ( (x1...> SMILES TEXT NOT NULL, (x1...> ID TEXT PRIMARY KEY, (x1...> INCHIKEY TEXT NOT NULL (x1...> ); sqlite> .schema ID_DATA CREATE TABLE ID_DATA ( SMILES TEXT NOT NULL, ID TEXT PRIMARY KEY, INCHIKEY TEXT NOT NULL ); sqlite> .mode tabs sqlite> .import /Users/chrisswain/Projects/Pubchem/InChiKey/AllInChiKey.tsv ID_DATA |
With the data now imported you should see the SQLite database in the PubChem folder

We can now search this database from the Terminal using the following commands.
|
1 2 3 4 5 6 7 8 9 10 |
sqlite> .tables ID_DATA sqlite> SELECT * FROM ID_DATA WHERE ID == "500061"; OC1(C(=CCC(C1)C(=C)C)C)C1(O)C(=CCC(C1)C(=C)C)C|500061|WPQAOGZTDKTBHI-UHFFFAOYSA-N sqlite> sqlite> sqlite> sqlite> SELECT * FROM ID_DATA WHERE INCHIKEY == "WPQAOGZTDKTBHI-UHFFFAOYSA-N"; OC1(C(=CCC(C1)C(=C)C)C)C1(O)C(=CCC(C1)C(=C)C)C|500061|WPQAOGZTDKTBHI-UHFFFAOYSA-N sqlite> |
One thing that is immediately obvious is the search is virtually instantaneous, and this is a database of 99 million records.
Using a Jupyter notebook
Whilst it is possible to run searches from the Terminal there are advantages to running search from a Jupyter notebook, this is described in detail here.
The first step is to create a connection to the database. The returned Connection object “connection” represents the connection to the on-disk database. In order to execute SQL statements and fetch results from SQL queries, we will need to use a database cursor. Call connection.cursor() to create the Cursor:
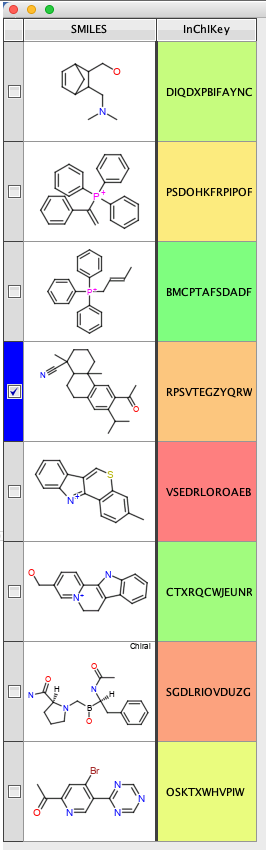
In order to search the database we use the SELECT command, in this case the search is for a single InChiKey. The targetinchikey is first defined and the cursor.execute to assign the returned results to “rows” . The result is a list of tuples (CHEMBLID , SMILES , INCHIKEY). Of course SMILES strings are not that user friendly when it comes to viewing chemical structures so we can use RDKit to display the structure within a pandas data frame. The SELECT statement can also be used to search for a list of InChiKeys.
Substructure searching
Whilst this provides a very fast look up for specific structures there are of course occasions when a substructure search is required. Fortunately, due to fantastic work from Riccardo Vianello there is Chemicalite a SQLite database extension for cheminformatics applications. This supports storing molecules and fingerprints, compute descriptors, run chemical queries on a SQLite database. It is available on GitHub https://github.com/rvianello/chemicalite and can be installed using Conda.
Details on installing Chemicalite are in this tutorial. https://macinchem.org/2023/04/12/structure-based-searching-sqlite-database/. The Jupyter notebook below shows creation of the sqlite database and import all within the notebook. Whereas the sqlite database containing just the SMILES, ID and InChiKey is 11 GB, the file with molecular objects is several hundred GB.
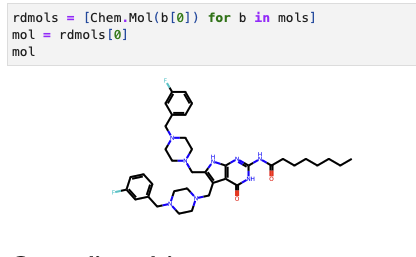
Searching, returns the molecule as a binary object, to get the mol object you need to use the mol_to_binary_mol, this can then be displayed. However, as it times searching is fairly slow.
ChemicaLite uses a virtual table mechanism to support indexing binary fingerprints in an RD-tree data structure, and this way improve the performances of substructure and similarity queries.
Without indexing

With indexing

The sqlite database containing molecule objects and fingerprints is just over 400 GB.
I’ve updated the Jupyter notebook above with similarity searching, all using the brilliant Chemicalite GitHub https://github.com/rvianello/chemicalite
Searching from other applications
A python script that uses the InChiKey to find the PubChem ID, after the imports, we first need to get the input, this is the first argument in the input command.
We then set up the connection to the sqlite database, note we need to include the full path to the database. Then construct the query and execute, parse the list returned to get the PubChem ID that the script returns
|
1 2 3 4 5 6 7 8 9 10 11 12 13 14 15 16 17 18 19 20 21 22 23 24 25 26 27 |
#!/usr/bin/env python # coding: utf-8 import sqlite3 import io import os import sys targetInChiKey = sys.argv[1] connection = sqlite3.connect("/Users/chrisswain/Projects/Pubchem/pubchem.sqlite") cursor = connection.cursor() #targetInChiKey = "WPQAOGZTDKTBHI-UHFFFAOYSA-N" targetID = cursor.execute("SELECT ID FROM ID_DATA WHERE INCHIKEY= ?", (targetInChiKey,),).fetchall() if not targetID: PubChemID = "Not Found" else: PubChemID = targetID[0][0] print(PubChemID) |
This script can be accessed from the Terminal
|
1 2 |
python /Users/chrisswain/Projects/Pubchem/searchinchikey.py DIQDXPBIFAYNCC-UHFFFAOYSA-N 500002 |
This script can also be accessed by other applications, for example Vortex.
The Vortex Script
|
1 2 3 4 5 6 7 8 9 10 11 12 13 14 15 16 17 18 19 20 21 22 23 24 25 26 27 28 29 30 31 32 33 34 35 36 37 38 39 40 41 42 43 44 45 46 47 48 49 50 51 52 53 54 55 56 57 58 59 |
#Use InChiKey to search Local copy of PubChem to get ID #Authored by Chris Swain (http://www.macinchem.org) #All rights reserved. # Python imports import urllib2 import urllib import subprocess from com.xhaus.jyson import JysonCodec as json # Vortex imports import com.dotmatics.vortex.util.Util as Util import com.dotmatics.vortex.mol2img.jni.genImage as genImage import com.dotmatics.vortex.mol2img.Mol2Img as mol2Img import jarray import binascii import string import os myhome = os.getenv('HOME') input_label = swing.JLabel("InChikey column (for input)") input_cb = workspace.getColumnComboBox() panel = swing.JPanel() layout.fill(panel, input_label, 0, 0) layout.fill(panel, input_cb, 1, 0) ret = vortex.showInDialog(panel, "Choose InChiKey column") if ret == vortex.OK: input_idx = input_cb.getSelectedIndex() if input_idx == 0: vortex.alert("you must choose a column") else: chosen_col = vtable.getColumn(input_idx - 1) colPubchem = vtable.findColumnWithName('PubChem', 1) coldone = vtable.findColumnWithName('Done', 1) rows = vtable.getRealRowCount() for r in range(0, int(rows)): inchikey_id = chosen_col.getValueAsString(r) coldone.setValueFromString(r, "done") errorText = "error" # python /Users/chrisswain/Projects/Pubchem/searchinchikey.py WPQAOGZTDKTBHI-UHFFFAOYSA-N #vortex.alert('INChiKey = '+inchikey_id) p = subprocess.Popen(['/Users/chrisswain/miniconda3/bin/python', '/Users/chrisswain/Projects/Pubchem/searchinchikey.py', inchikey_id], stdout=subprocess.PIPE) output = p.communicate()[0] #vortex.alert(output) colPubchem.setValueFromString(r, output) vtable.fireTableStructureChanged() |
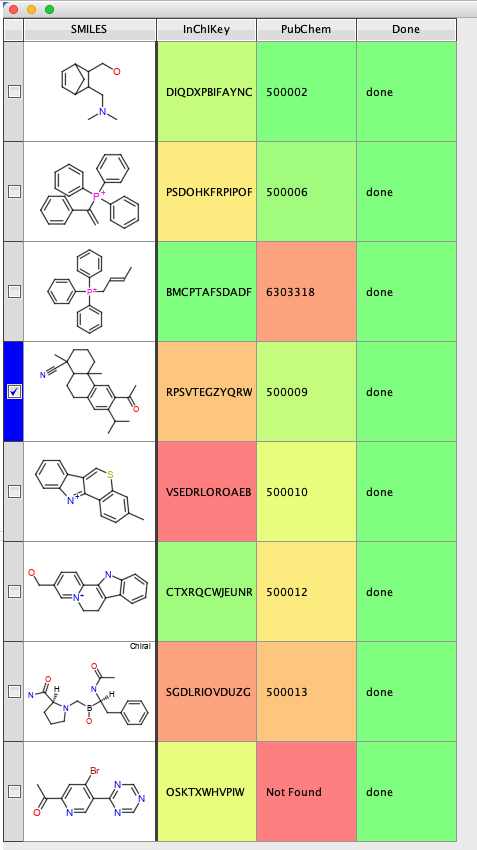
Use Vortex to calculate the InChiKey and then the above script to search the sqlite database
The script creates two new columns, then creates the command to use the python script and populates the workspace.